Making a Worm Farm

A little while ago we decided that a worm farm would be a good addition to our garden. We looked at the Can O Worms, the Reln Worm Factory and countless plans for farms made from polystyrene boxes, bath tubs etc etc. So we made our own take on all the plans and built our first worm farm today.

We started with 3 black plastic tubs, a plastic tap and some fly screen. DH made a frame out of scrap pieces of stainless RHS so the tubs can sit up off the ground and the liquid can drain into another container. Total cost to us was around $30 plus worms.

Photobucket

Firstly we had to drill holes in 2 of the tubs. This is for drainage of the 'worm wee' and so the worms can move freely between the levels. The base tub is solid and has the tap installed in the bottom. Because these tubs stack on top of each other fairly closely, DH made up some little brackets so they would sit up higher (about 150mm).

Photobucket

In the base tub we put in the tap so we can empty out the liquid that drains down through the farm.

Photobucket

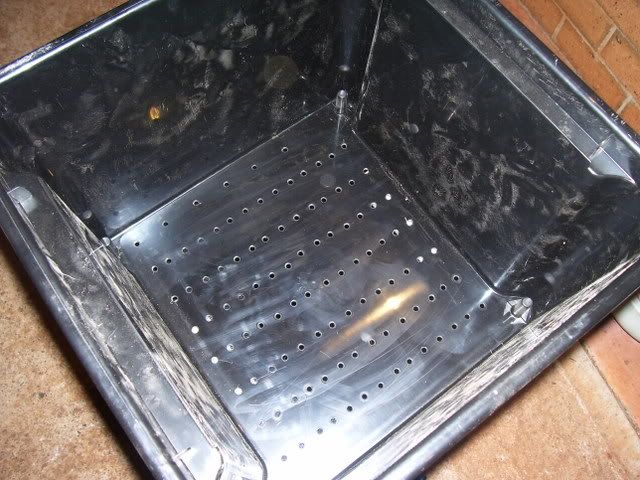
The middle tub has fly screen taped down over the holes so the worms don't fall down into the liquid. The worms will move between the middle and top levels searching for food. This is the middle tub.

Photobucket

The top tub just has the holes in the bottom, so they can move up and down between the top and middle tubs.
Photobucket

With all of that done, we can start adding the bedding for the worms. We used 2 bricks of coco peat which expand to around 9litres when rehydrated and some damp potting mix. The middle tub was filled up to the bracket where the bottom of the top tray sits. This will be the worms main bedding layer. The top tub has a small amount of coco peat and potting mix and about 6 layers of wet newspaper on top. The worm food will be put under the newspaper, which keeps flies and light out, and the moisture in.

So here is the finished product!! The fancy frame that DH made, the solid tub with tap in the bottom, the middle bedding layer filled with coco peat, potting mix and worms, and the top feeding layer with a small amount of coco peat and potting mix, and damp newspaper on top.

Photobucket

Other Homemade Cleaning Products


Here are some more general cleaning products that we use here instead of commercial chemical cleaners. Using a combination of these, we don't ever have to purchase cleaning products from the supermarket. Yay!

Liquid Soap
Bar of homemade or pure soap
Water

Cover the bar of soap in enough water to cover it, and leave overnight to dissolve. When it is soft and slimy, add enough water to make a consistency like pouring cream. This can be used for almost anything. Use a small amount for cleaning benches, floors and as a hand wash.

Creamy Cleanser

Bi-carb Soda
1 cup Liquid soap or sulfate free detergent

Mix enough soda into the soap to form a creamy paste. This is the best for scrubbing showers, tiles, benches and sinks.

Window Cleaner
1/4 cup vinegar
1 Tb liquid soap
2 cups water

Shake together in a spray bottle and spray all over the glass. Wipe off with a clean rag, or newspaper.

All Purpose Cleaner
1/4 cup liquid soap
2 cups water
8 drops essential oil

Shake up in a spray bottle and use as you would any commercial spray cleaner. The best for in the kitchen, benchtops, stove top etc.

Homemade Dishwashing Detergent


The last thing for us to strike of the chemical list was the powder and rinse aid for the dishwasher. I think this one will have the biggest affect on our health. Now none of our cooking or eating utensils are getting drowned in poisons. Ick!! Here 'tis:

Dishwashing Detergent
1 cup washing soda
1 cup bi-carb soda
1/4 cup salt
1/4 cup citric acid
20 drops lemon essential oil

Mix it all up and shake it really well. It tends to clump up but if you shake it each time you use it it's fine. I also use a tiny amount of a natural gel from the Sydney Essential Oil Co. They have a massive range of bases for soaps, detergents, hand creams, body butters etc and are all sulfate-free. Check out their website at SEOC.

Vinegar can be used as a rinse aid to fill up the dispenser. That will make sure your glasses aren't cloudy looking. Good luck!

Image from seoc.com.au

Homemade Washing Powder & Softener


Another thing I wanted to change at our place was the use of harsh cleaning chemicals. Most products contain chemicals that cause a heap of problems for the environment and for people with allergies or chemical sensitivity. Even the majority of homemade laundry detergent recipes contained Borax (sodium borate) which is a natural element, but has been banned in the US as a food additive and can be especially harmful to infants respiratory and reproductive systems.

So, after a bit of trial and error, this is the final recipe that works the best for our laundry. It is basically equal parts soap and washing soda. You can either grate pure soap, handmade is best, otherwise a pure laundry soap, with no fragrance will be fine. Sunlight soap is the most common brand.


Homemade Laundry Powder
6 bars Sunlight Soap
1kg Lectric washing soda
2 bars Sard wonder soap

Grate up or chop in a processor all the soap and mix it up in a large container with the washing soda. That's it! It's easy, quick, cheap and works really well. Use about one quarter of a scoop, or around 2-3 tablespoons depending on how dirty the clothes are.

The Sard helps to get stains out, and the washing soda is a water softener and helps to break down grease. The washing soda can be bought in crystal or powdered form. You'll need the powdered one. The is the one I have:


Homemade Fabric Softener
1/8 cup white vinegar
2 drops lavender essential oil

Add to the softener dispenser in your washing machine, or pour in just before the rinse cycle. The vinegar helps to remove any remaining soap, eliminates odours and makes towels super fluffy. The lavender is obviously for fragrance, and you could try other oils like Eucalyptus, Lemon Myrtle, Tea Tree etc etc.

Aside from the environmental benefits, the financial savings are huge. At current prices, using Omo works out at about 38c per wash. Using the homemade powder its down to 6c per wash. The softener is around 6c as well.

The low-down on lye

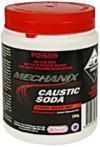
Soap gets it's name from the latin word 'sapo' meaning soap making or saponification. This is the chemical reaction caused my mixing a fat with a strong alkali, either potassium hydroxide or sodium hydroxide (caustic soda). This is the one I got:

Photobucket

The fats used in soap are chosen based on their individual characteristics. ie sweet almond for moisturising and lather, calendula oil for healing and soothing, coconut oil for lather and hardening the soap etc.

A list of oils and their properties is here.

The lye is highly alkaline and can cause severe burns if you get it on your skin. You need to wear gloves and work in a well ventilated area to avoid the fumes. The good thing is that there is no lye in the end product. The lye and the fat counteract each other when in the correct proportions, leaving nothing but pure glycerin soap. Most store bought soap has had the glycerin removed, to be sold as a seperate product. Handmade soap still contains all the natural moisturising glycerin.

When you mix the fat/lye mixture together, it will come to a stage called 'trace'. This is when the lye has done most of its work with the fat and the mixture thickens up to about the consistency of cake batter. At this point it is possible to add some extra oils that will not be canceled out by the lye (called superfatting), fragrances, exfoliants etc. You can use essential oils, salt, sugar, clay, flowers, herbs, food dye, moisturising oils like jojoba, sweet almond or grapeseed, honey, coffee, oatmeal etc etc.

The moulds you use dont need to be anything spectacular - empty containers, biscuit or muffin trays, chocolate moulds etc. The soap will have to stay in the moulds for a day or so to harden up a little bit. If you have trouble getting the soap out of the moulds, chuck it in the freezer for an hour or two to shrink the soap. It should all just fall out when you invert it. If you used a large tray or container you can cut the soap into bars with a sharp knife or you can use some fine wire or fishing line.

Then comes the hard part. You have to leave it for weeks and weeks to cure. After the first two weeks the saponification process is completed. After that, it's just a case of letting it dry out. The longer you can leave it, the harder it will get, the longer it will last, the milder it will get and you will get a richer lather. Around 6-9 weeks is normal. You could use it after the 2 weeks but you will have a really soft bar and could end up with a sloppy mess in the shower.

First Time Making Soap!!

Photobucket

So after reading about making soap on a few different sites, finally decided to give it a whirl. All as part of my 'buy as little as possible/make as much as I can' mission. Here we go!

I used the the soap calculator found here to get the correct amount of fat/water/lye. It's a pretty touchy recipe so you need to use the calculator to get the quantities right. Lye is soap language for caustic soda. You get it at the supermarket near the Draino.

I wanted to use Olive Oil and Rice Bran Oil, because these are what I had and I read that they were great for the skin. Honey and milk were also other things I wanted to use. This is the recipe I tweaked around with on the calculator.

Ellice's Milk, Honey & Oat Soap (no it's not edible!)

800g Olive Oil
200g Rice Bran Oil
430g Milk
128g Caustic Soda
4 tbs Honey
3 handfuls Quick Cooking Oats

First you have to semi-freeze the milk because when you put the lye in, it heats up and can boil if its not already really cold. Once it looks like a milk slushy, you carefully, slowly pour in the lye granules. Stir it up until it dissolves. It will heat up, most likely curdle and look like this:

Photobucket

Measure out the oils into a large saucepan and pour in the lye/milk mix. Hit it with a stick blender until it reaches trace. (Trace is when it thickens up and looks like custard).

At this point you can add colourings, fragrances and textures. So stir in the honey and oats until its all combined. Now you can pour it into the moulds. I used a plastic tray and some old shallow muffin trays that I don't use anymore. And this is what it looks like now:

Photobucket

After 2 days I can unmould it and cut it up into pieces. Then it has to cure for a month at least so it hardens up fully. No idea how I can wait that long!! I'll post pics of the final product I promise!

-------------------------------------------------------

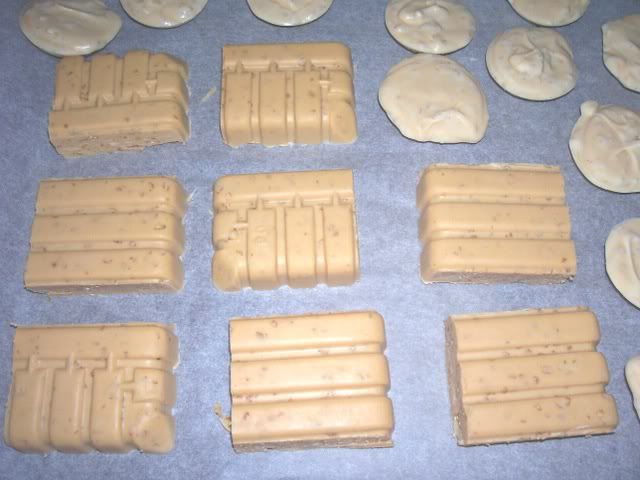
OK, here we are after 2 days, and the soap has come out of the mould. It all came out in one go, and I cut it up with a sharp knife. The square ones from the tray look really interesting I think, and the little round ones from the muffin tray are cute as! The round ones have dried out alot quicker so look paler.

Photobucket

Photobucket

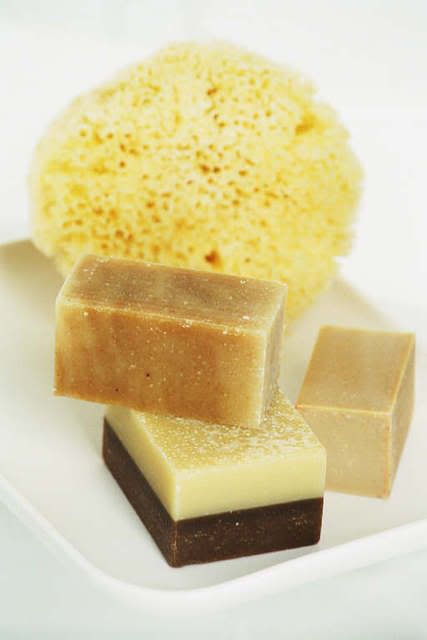
(top image courtesy of dkimages.com)

Warning: When mixing the lye it gives off really nasty fumes. Wear gloves and long clothing as a minimum. Treat it as you would oven cleaner. Keep the area well ventilated or mix it outside. If you get it on your skin, wash and wash and wash with cold water. Vinegar is also recommended.